Here we put things together showing how to use the ETL tools to clean up and normalize an example CSV data file, how to ingest that file and create a display of the data.
The overall flow is to -
- Upload the raw data file to RAMADDA
- Clean it up and convert it using the ETL tools
- Add the converted file back to RAMADDA as a special "Text Point Data" entry type
- Create a plot using RAMADDA's wiki facility
The example we are using is data from the City of Boulder's Open Data Repository that shows greenhouse gas emissions and looks like -
Year,Category,Sub-Category,Emissions per Sub-Category (MTCO2e)
2005,Source,Electricity,"1,014,560"
2005,Source,Stationary Fuels,"274,089"
...
2014,Source,Transportation Fuels, Not Available
2014,Source,Other, Not Available
...
- First download the GHGI_Community_Emissions_Source.csv file.
- Assuming you are logged in to RAMADDA you will upload the file to RAMADDA.
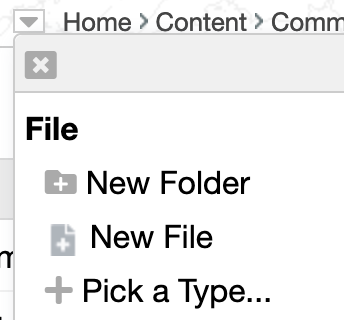
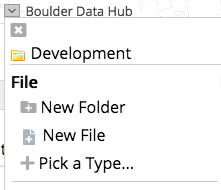
- Navigate to some folder
- Click on the menu and select "New File" -
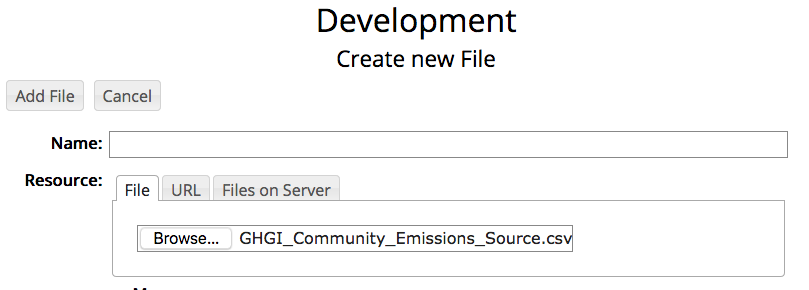
- Upload the file in the Add Entry form -
- Once you upload the raw CSV file RAMADDA automatically creates a "CSV File" entry type.
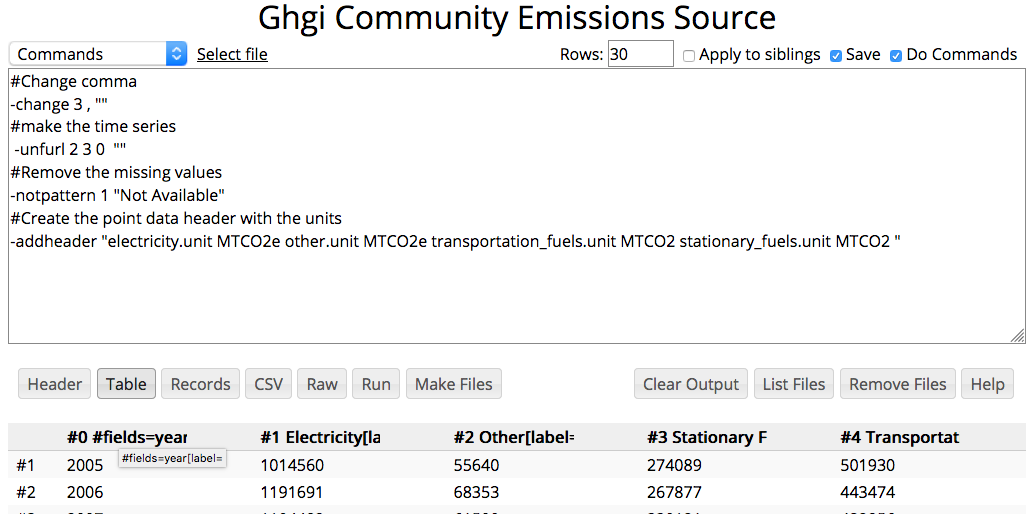
Next, the data needs to be cleaned up, reformatting the numeric values, removing the missing years and transforming the data to group the fields by year to be able to create time series displays.
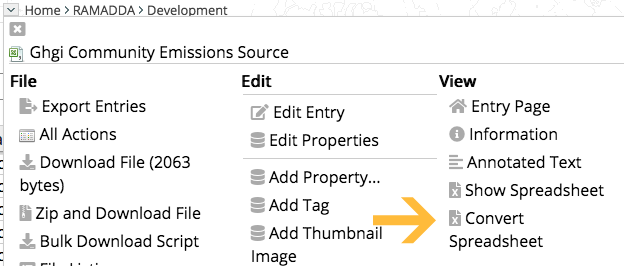
From the menu choose "Convert Spreadsheet" -
This takes us to the interactive ETL conversion form (view it
here).
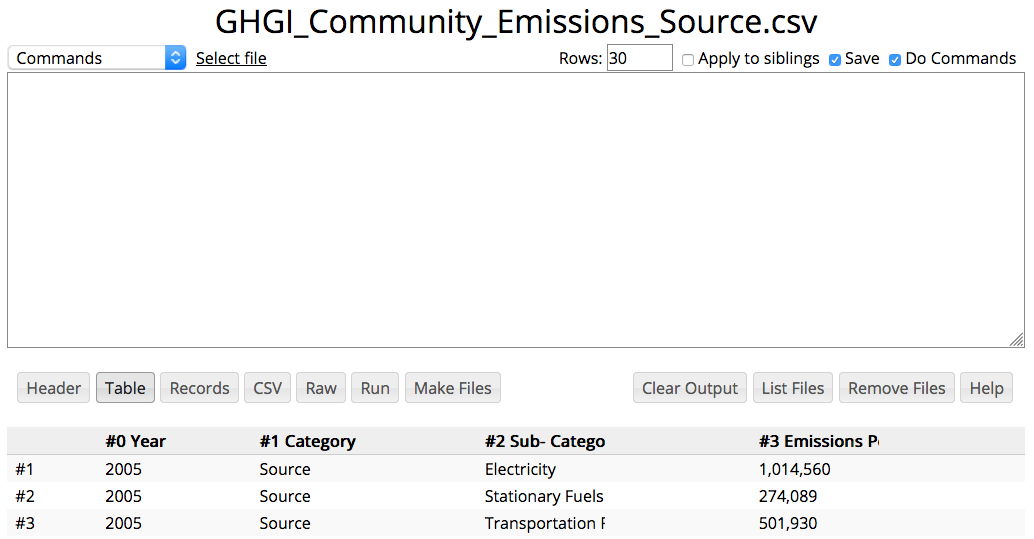
RAMADDA's ETL facility provides a large number of operations (documented
here) for transforming the CSV file. One adds any number of conversion commands in the main input area. The buttons along the bottom (e.g., Table, Records) allow for the results to be viewed in different ways.
The below commands are used to convert the raw data. This changes the commas in the
value field (column 3 in the raw data), groups the different values by year, removes the years that have no values then adds RAMADDA's point data header to the result file.
Once all is good use the "Make Files" button to process the entire raw file. This provides a link to download the temporary processed file.
Once you download the file you can then upload it back to RAMADDA to the folder of your choice.
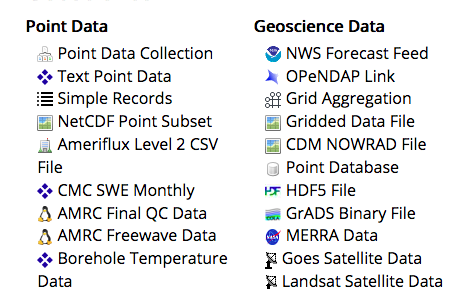
Instead of adding it as a regular CSV file you need to specify a "Text Point Data" entry type. Go to the folder's menu and choose "Pick a Type" -
Since RAMADDA supports a huge number of entry types this next page can be daunting but fear not. Just scroll down or search in the page for "Text Point Data" and select the link -
This takes you to an Add Entry form. Upload the converted file.
You have now created a new entry with the structured data. You can view information about the entry including
its file format with the entry menu "Information" link (example
here).
The default display of the new entry does not show any plots of data. To define a new display RAMADDA's wiki facility is used. From the entry's menu go to "Edit Entry". You will need to change the description. To specify that
this is wiki text add a "<wiki>" tag to the beginning of the description (documented
here).
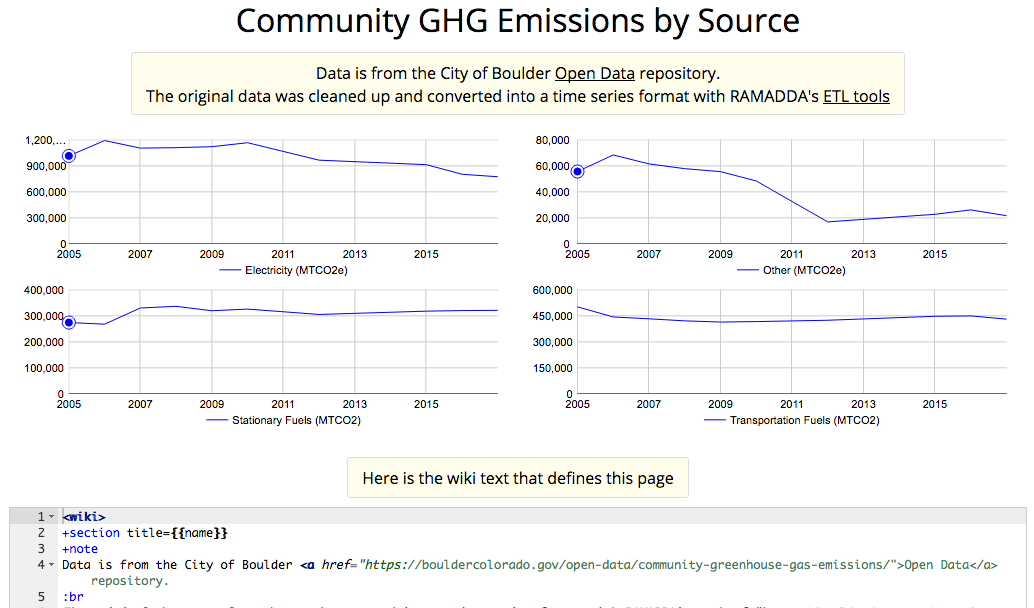
The
example entry
on the Boulder Data Hub has some descriptive information and shows 4 time series plots -
The above page also shows the wiki text. The wiki text facility is very powerful and provides
numerous display types available - line charts, bar charts, dot plots, etc. There are a number of examples
shown
here. Here is further documentation -
You can change the default display of your new data entry by changing its description. Copy and paste the
example entry's wiki text.
Alternately you can create other wiki pages that import and display data from other entries. Simple go to
some folder in RAMADDA and choose "Pick a Type" from the Folder's menu. The Wiki Page type is listed under the "Information" category (search for "wiki" in the web page. Create the wiki page - specifying a name and the wiki text. To display data from other entries you use the same wiki text as described above but you also specify an
entry-
{{display  type="linechart"  layoutHere="true"  fields="#1" entry="becb663b-d464-451a-a3c6-3ec8a4816515"}}
{{display  type="linechart"  layoutHere="true"  fields="#1" entry="some other entry id"}}
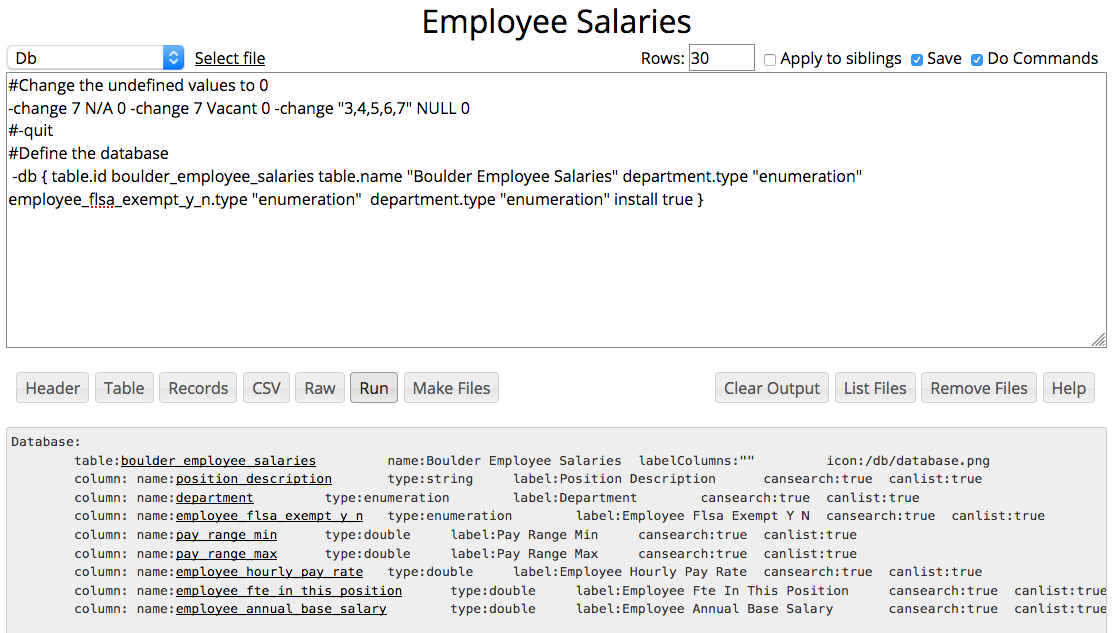
Using the ETL tools one can also create searchable databases from CSV files. To do this the user needs to be a site administrator since a plugin is
created and installed as part of this process.
We're going to use the City of Boulder
employee salaries data.
Like the example above one first uploads the CSV file to RAMADDA.
Here is the salaries file.
Defining a database is a 2 step process. You define operations to clean up and convert the CSV file. Then, there is a special command (-db) that creates the database plugin. The -db command (documentation here) takes a number of name/value properties as shown. When you press "Run" the database schema is shown. The links will popup a menu that allows you to define various properties of the different columns (e.g., label, type, etc). If you set "install true" then when you run "Make Files" RAMADDA will generate the database plugin and install it.
Once you have defined and installed the database you need to comment out the -db command (or add a -quit command before it) and then press "Make Files" again to create the processed CSV data file. Download this file. Next, you need to create the actual database entry. Navigate to some folder and select "Pick a Type". Look for the database name that you specified and select that link to add the new database entry (note - you can have multiple different database entries based on the same database schema). Once you create the database entry got the "New" link, select the Bulk Upload tab and upload the processed CSV file. If you want to redo everything you can add a "nukedb true" property to the -db command. This, when run, will drop the previous database table and recreate it.